


foobar2000: 5.2 Creating a ColumnsUI layout
This section of the ColumnsUI tutorial involves creating a basic itunes-style layout, then a more advanced version.
Required components
To create a basic iTunes layout, the following components (not included with columnsUI) are required:
Album art panel (foouiealbumart)
Music browser (foobrowser_)
Quick search toolbar (foouiequicksearch)
To create the advanced iTunes layout, the additional components are required:
PanelsUI (but you don't need to know how to use it!)
Power Panels (foouiepowerpanels)
(Optional) Channel spectrum panel (foouievischannelspectrum)
5.2.1 Creating a basic version
Basic layout
Create a new preset in the columns UI preferences window, layout tab. The basic layout is as follows:
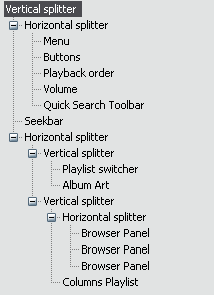 Basic itunes layout
This gives you the shape, though there's plenty of tweaking to be done.
Firstly, remove the captions for everything except the playlist switcher, album art and browser panels by clicking on each item in the layout and unclicking "Show caption" in the item details menu. Click on the first browser panel in the layout list, and in the item details menu click "configure" near the bottom. In the pop-up menu that appears, choose "Genre". Then click "Use custom title" and type in "Genre". Do similar things for the next two, but replace genre with artist and then album.
For the album art to work, you need to place the cover image file in the folder that contains the album, and name the file "folder", "cover" or "front" plus the extension. You can call them something else, but you have to add the name in the album art preferences by right clicking on the panel and moving to the "Sources" tab.
Colours and fonts
Go to the "Colours and Fonts" sub-section of columnsUI preferences, and go to the fonts tab.
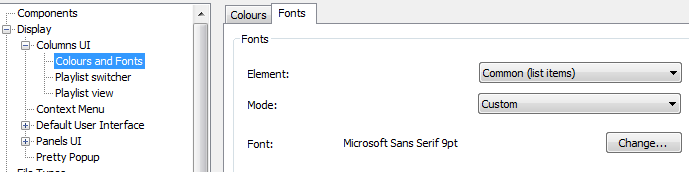 Colours and fonts panel
For the element "Common (list items)", select Custom from the mode selection menu. Then choose Microsoft Sans Serif, 9pt as the font. Do the same for "Columns Playlist (items)", except 8pt.
Under the colours tab, use the following tables to apply the red-green-blue colours for the elements "Playlist Switcher" and "Global". For each element you modify, you have to select "Custom" from the the mode selection menu.
Foreground:
Background:
Item:
0-0-0
219-215-240
Selected item:
255-255-255
71-105-224
Inactive selected item:
0-0-0
170-170-170
Then head to the "Playlist view" subsection of Columns UI preferences, and then the "Globals" tab, then the "Style" sub-tab on that page:
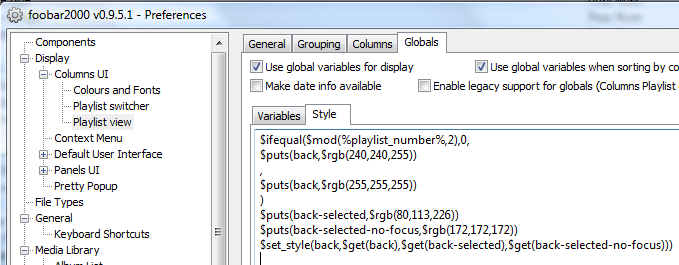 Global style variables
Select everything in the style window, and replace it with:
$ifequal($mod(%playlist_number%,2),0,
$puts(back,$rgb(240,240,255))
,
$puts(back,$rgb(255,255,255))
)
$puts(back-selected,$rgb(80,113,226))
$puts(back-selected-no-focus,$rgb(172,172,172))
$set_style(back,$get(back),$get(back-selected),$get(back-selected-no-focus)))
You don't need to know what that means yet. It should provide a nice alternating white and very light blue background for the playlist, just like iTunes. Oooh, itunesy.
Browser
You can change the colours of the browser panels by going to "Preferences -> Media -> Browser":
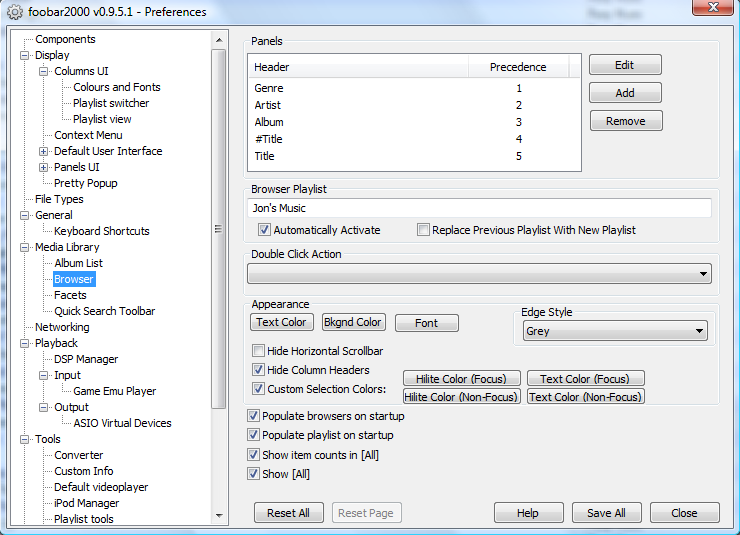 Browser playlist panel
Tick the custom selection colours box, and use the following colours to get the right combination:
Hilite Color (Focus)
71-105-224
Text Color (Focus)
255-255-255
Hilite Color (Non-Focus)
170-170-170
Text Color (Non-Focus)
0-0-0
Again, use Microsoft Sans Serif 9pt for font.
You should also select "Automatically Activate" on the browser. You can rename the "Browser" playlist to anything else, such as "My Music". And finally, check "Hide Column Headers", which will mean that all your panel captions are of the same format. This looks especially good in Vista.
One thing I find useful is to map a keyboard shortcut to refresh the browser contents. When you start using the browser, you narrow your libray down and effectively make your playlist smaller, but you can bring your whole library back by refreshing the browser contents. This can be done in the main menu, or, as is my preference, by mapping a keyboard command to it. This is done in the preferences window, under "General -> Keyboard Shortcuts". Click "Add New", then type in "refresh" in the filter box, then select the command. With your new shortcut still selected, put in a suitable keyboard command. Then save.
5.2.2 Creating a more advanced version
The finished result will hopefully look something like this:
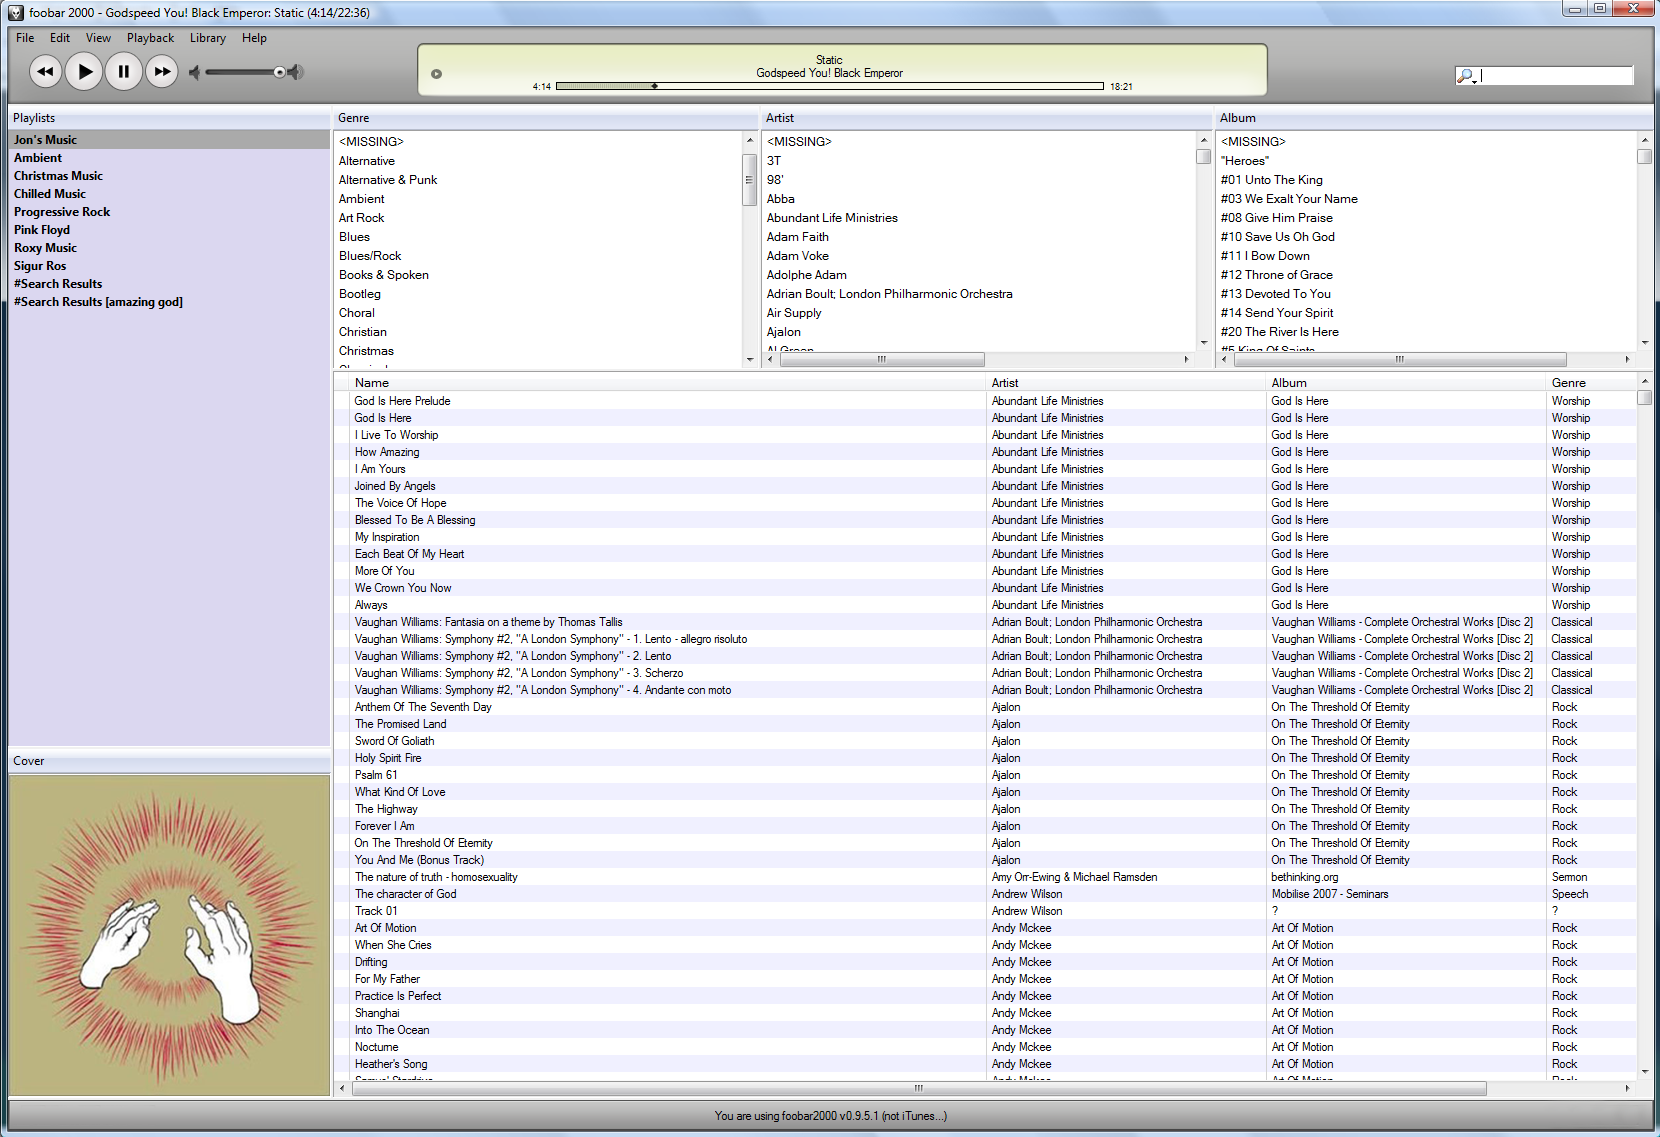 iTunes style layout
The advanced layout makes use of the "Track Display", which is a component that comes with panelsUI. Having unzipped panelsUI to your components folder, make sure you load your foobar with columnsUI.
Firstly, create the following layout, following with the steps shown in the basic section to configure the panels:
 iTunes advanced layout
Then download the following rar file containing images (that I've created to mimick iTunes, completely from scratch to avoid copyright issues):
Extract this to a memorable directory: I chose C:\foobar\myitunes as the directory for my images, and it will be very easy for you if you do the same, otherwise you will have to follow the steps in italics below. (Edit: how Windows-biased was I back then?)
Go to the layout page. For the first track display panel, select it and click configure at the bottom right of the window. You will get a window with lots of code in. Delete all the text in the window that comes up, and copy and paste the code from the following text file:
You will end up with this (hopefully):
 Track display script
Ignore this if you used C:\foobar\myitunes as the image directory
At the top of the track display window, there will be a couple of lines starting with "//", which are comments. After that, you will see $puts(path,'C:\foobar\myitunes\'). Here you should replace the directory in quotes with your directory, also in quotes. Then follow the page down to some more comments, where it says "You also need to change the location of slider.png...". After the comments, wherever you see C:\foobar\myitunes\ you should replace it with your directory.
Ok, stop ignoring now
Now click "ok" on the track display panel window, then "apply" on the columnsUI window, and the changes will be made. For the second track display panel use the code from this file:
Again, replace the directory as required.
If it all works correctly, then that's great! Chances are that there could be problems with things in the track displays overlapping or not quite fitting. That's because I'm using a different resolution screen to you - try this one:
To configure the spectrum, click on the little button to the left of the seekbar on the top track panel, which will bring up the spectrum meter in default format:
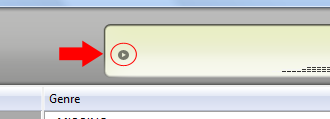 Click this to bring up the spectrum analyser
Right click on the spectrum in the main foobar window and click configure. Choose a light grey foreground1, and black for foreground2 and background. Check "transparent background" and "bar mode", and choose a bar width of 4. It should look like this:
 Spectrum configuration
That should give you a good iTunes style spectrum meter. Play around with the settings of the spectrum, you can get some great effects.
This brings an end to the iTunes layout tutorial. I hope you've had success! If you haven't, email me at jon@joncairns.com and let me know the problem. Next we'll look at some advanced tweaking.
Next section: 5.3 Tweaking ColumnsUI
